 Before writing this guide, the cost of the dryer was unclear to me. However, ever since I learned that your clothes dryer is one of the most expensive household appliances and air drying your clothes is a seemingly simple alternative, I’ve been on a quest to find out what the best, cheapest way to dry clothes is.
Comparative Cost of Air Drying
The first step to saving is knowing the cost of your options. Energy is the biggest cost to your clothes dryer, a resource not even necessary when air drying your clothes.
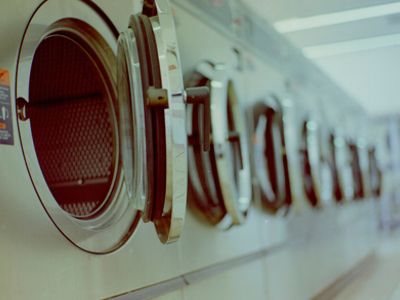
Clothes Dryer
According to HowStuffWorks, your clothes dryer heats and spins clothes in an attempt to both bake the water off and flick it out. Air is sucked in through the heating vent, into the tumbler, through the lint trap, and out the exhaust vent. Meanwhile, the tumbler is spinning by means of motor-powered belts. This whole process sends energy to both the motor and the heating unit and utilizes approximately 2.7 -3.3 kWH per load. In Charlottesville, this costs $0.30 – $0.37 per load.
The average clothes dryer typically lasts 11 years with the average American family doing 345 loads of laundry per year. The cost to replace is $600, which makes the cost per load approximately $0.16.
If you don’t use liquid fabric softener then you probably use dryer sheets. Dryer sheets cost $0.02 – $0.04 per sheet and they recommend using one per load.
Like washing clothes in a washing machine, drying them in your dryer takes a toll on the health of your clothes. In 1999, Science Daily reported:
When repeatedly machine dried at high temperatures, cotton fabrics eventually tear more easily than those tumble-dried at room temperature, drip-dried indoors or dried outdoors by sunlight… . Abrasion from the tumbling action of dryers also contributes to fabric damage.
In addition to damaging cotton faster, the heat and abrasion of the dryer is known to destroy or overstretch the rubber elastic in pants, socks, and underwear. As Classic Cleaners says in “The Top 10 Ways to Ruin Your Clothes“, “The dryer is what does most damage to clothes causing shrinkage, warping elastic, and the tumbling action is very rough.” And remember all that lint you clean out of the trap after your load is done? In the words of Tsh from Simple Mom, “That’s fabric slowly wearing off of your clothes.”
Shannon Larson on Quora puts it simply saying, “The life of any garment will be increased by line-drying.”
GE, on the other hand, claims, “Drying your clothes won’t decrease their life expectancy.” It’s hard to know what evidence they have to make this claim.
So the question emerges, how much does the clothes dryer damage your clothes if at all? That is a much harder statistic to find.
In the 18-month study mentioned above, the cotton clothes lost 25% of their fabric strength. If we just assumed that is a semi-gradual decline, that would mean that in 3 years, your clothes would only have 56% of their original fabric strength remaining and, if they are thin or delicate to begin with, will likely break before year 6 when only 32% of the original strength remains.
Indeed, 3-6 years is a probable estimation for life expectancy of many types of tumble-dried cotton clothing. We’ve all had a favorite t-shirt or pair of jeans last longer, but not many college graduates still have the socks and underwear they bought in high school and, if they do, one can bet a majority of those items have egregious holes in them.
Clothes Dryer
|
||
| Min | Max | |
| Energy | $0.30 | $0.37 |
| Maintenance | $0.16 | $0.16 |
| Dryer Sheets | $0.02 | $0.04 |
| Clothes Replacement | – | $0.06 |
| Total | $0.48 | $0.63 |
So let’s just factor in the cost of socks ($1 – $1.75 per pair of socks) and underwear ($1.50 – $5 per underwear). Let’s say that by 6 years, you have to buy a new two-week batch of socks and underwear. That’s 14 of each per person or a $35 – $91 per person expense. We’ll assume a family of two, one male one female since the pricing is different, making a $126 expense every 6 years. That’s $21 per year or $0.06 per load.
Including electricity, dryer sheets, maintenance, and clothing replacement, that makes the total cost of your clothes dryer $0.48 – $0.63 per load.
At the average usage, that is $165.60 – $217.35 per year.
Air Drying
Although the air itself is free, air drying is an art of its own and does have several start-up expenses.
Regardless of which air-drying method you choose, since you cannot use dryer sheets when air drying, you are likely using some kind of fabric softener during or after washing. If you don’t use anything, your clothes are more likely to get stiff and hard from the hardness of your water or from laundry soap residue baking in the sunlight. That being said, even if you use fabric softener, the most common complaint of air-drying is stiff towels. This seems to be largely unavoidable unless you have a particularly good, breezy climate.
There are several options when it comes to fabric softener.
Liquid fabric softeners are added to your washing machine either in a special fabric softener compartment or manually directly into the water during the rinse cycle. These typically cost $0.15 per ounce and require 1 oz per load.
How Stuff Works recommends, “Some people prefer to pour a bit of white vinegar onto their clothes during the washing machine’s rinse cycle. As with fabric softener, vinegar can soften clothes, and it has a mild anti-static effect. As a bonus, vinegar works well to get rid of mildew.” Those who use vinegar as their fabric softener swear that, if you use the correct amount, your clothes do not smell like vinegar. White vinegar costs $0.02 per ounce. You use about 1/2 cup (4 oz) either during the rinse cycle directly into the water or in a washing machine compartment. This would cost $0.08 per load.
(If you want to have a scent, Betty recommends adding eucalyptus essential oil ($0.66 per ounce) with the vinegar. Her recipe is 2 c. white vinegar (16 oz) and 3 tsp eucalyptus essential oil (1/6 oz). Using 1/2 cup each time, this would cost $0.43 per load.)
So if you’re using vinegar or traditional fabric softener, it would cost you $0.08 – $0.15 per load.
Next, There are two main options of how to air dry: indoor or outdoor.
For both of these strategies, you have to get clothes up and drying as fast as possible to ensure that they don’t wrinkle and you need to get a breeze to blow on them if you’d like them fluffed, like the dryer does.
Outdoor
The main strategy of outdoor air drying is hanging your wet clothes on an outside clothesline (preferably one in a windy, hot, sunny area) and then wait for your clothes to dry. Depending on your climate and your clothes, this method could regularly cost you next to nothing. The start up cost is a clothesline and clothespins.
There are many, many types of clotheslines and what kind you get largely depends on what your yard or balcony looks like. This could easily be a $30 – $300 expense per line depending on what kind and size you pick. The main destruction of clotheslines is putting too much weight on them. If it’s the kind that is kept outside the whole time, pressure treated wood could last 10 – 30 years. The metal or plastic clotheslines are more likely to break from loss of strength, which seems to be 5-7 years. Let’s estimate a bundle of clotheslines that in total cost $150, hold 2 loads of laundry, and last 10 years. That would be a $0.02 per load expense.
Clothespins are $0.30 each and you’ll need 2-3 for each item of clothing. If you store them outside, you’ll have to replace them frequently (since they’ll get mold and the spring hinge will rust from rain), but if you store them inside they will last 8-10 years. If you have to replace them every 8 years, the clothespins costs $0.01 per load.
According to Tammy, drying outside varies based upon the weather. (She puts her clothes out if the weather is sunny with a low of 40 degrees. Anything lower and she recommends indoor drying.) In dry heat or a warm breeze, drying your laundry could take 30 minutes – 3 hours depending on its thickness. On cold or humid still days, it takes 8 hours minimum.
Air Dry Outside
|
||
| Min | Max | |
| Maintenance | $0.03 | $0.03 |
| Fabric Softener | $0.08 | $0.15 |
| Total | $0.11 | $0.18 |
Because of this, you’re limited as to when you can do your laundry. Starting your laundry at 9pm and expecting it to be ready to wear the next morning is rather unlikely. To line-dry outside, you need to start in the morning and allow it to bake in the sun over lunch. Furthermore, your clothing may potentially get dirty again from being outside. This is especially true in pollen heavy regions and seasons or in locations with lots of birds.
So counting start-up fees and fabric softener, this puts the cost of air drying outside at $0.11 – $0.18 per load. At average usage, this is $37.95 – $62.10 per year.
Indoor
No matter what system of interior air drying you use, it will increase the humidity of your home. If you’re in a dry climate or its winter time, this is probably a welcome change. If you have AC that has humidity controls or smoke detectors set to go off when the house reaches a certain humidity level, then this change might be more of a nuisance.
Furthermore, because of the increased humidity, a 2012 study found a link between indoor clothes drying and the risk of asthma. The Telegraph reports, “Having more moisture in the air creates ideal breeding conditions for mould spores and dust mites which have been shown to cause asthma, academics said. …There was also a strong link between indoor drying and spore growth, which can be a health risk to people prone to asthma, hay fever and other allergies.”
As far as money goes, your AC will have to compensate to remove humidity from your house, costing you money. This is a hard statistic to find, but likely it’s less than running a dehumidifier, so we’ll use that estimate as our upper bound. A dehumidifier uses up 0.76 kWh of energy per hour, potentially costing you $0.33 – $0.66 per drying load if you run it while your clothes are drying.
Air Dry Inside
|
||
| Min | Max | |
| Energy | – | $0.04 |
| Maintenance | $0.02 | $0.02 |
| Fabric Softener | $0.08 | $0.15 |
| Fan | – | $0.07 |
| Dehumidifier | – | $0.33 |
| Total | $0.10 | $0.61 |
That being said, the best system of air drying inside seems to actually be a dryer – air drying combination: 5 minutes in the dryer to fluff and heat your clothing (at $0.008 per minute, that’s $0.04), then several hours next to a vent, in front of a fan, or in a sunny patch of your house.
If you choose the fan option, fans utilize 0.2 kWh of energy per hr, likely costing $0.07 per load.
If you’re indoors, you likely have one of the cheaper but also sooner-breaking drying racks. They cost around $30 and break in 5 – 7 years, costing you $0.02 per load.
This makes the total cost of indoor air dying $0.54 with a dehumidifier ($0.61 if you also need a fan) and $0.21 without. At average usage, this is $72.45 without and $186.30 with a dehumidifier (and $210.45 also with a fan) per year.
At the minimum estimation of only supplies and vinegar as fabric softener, it would cost you $0.10 per load or $34.50 per year.
Conclusion
So it’s true. The dryer costs money and air drying costs next to nothing. At $0.63 per load, drying your clothes can add up. If you’re like the average American family doing laundry 6 – 7 days every week (345 loads per year), your dryer alone could cost you $217.35 per year ($18.11 per month). That means suddenly there is a lot of room to save money by changing your drying styles.
With line drying outside costing only $0.18 per load (if that), which, for the average American family, is $62.10 per year ($5.18 per month), you could save up to $155.25 per year if you line dried your clothes outside instead of in the dryer.
However, if you’re like my two person family, doing two loads of laundry every two weeks, it costs you $24.96 – $32.76 per year to dry your laundry in the dryer ($2.08 – $2.73 per month). To line dry with the same frequency would cost $5.72 – $9.36 per year ($0.48 – $0.78 per month). Suddenly, the savings by switching to line drying is not so substantial. At the most, you could save $27.04 per year.
So here’s the question I face, is it worth having a constant eye on the weather channel, an 30 extra minutes of work hanging up all of my laundry outside, and up to 8 hours of inconvenience waiting for my clothes to dry to save $2.25 per month? For me, it is not. For others, it might be.
Outside |
Inside |
Dryer |
|||
| Min | Max | Min | Max | Min | Max |
| $0.11 | $0.18 | $0.10 | $0.61 | $0.48 | $0.63 |
If you live in a dry, hot, breezy climate, have a flexible schedule, are a morning person, do laundry fairly frequently, and are looking to save money, outdoor line drying sounds like the perfect option for you.
If you can’t line dry outside but live in a good climate for it, try doing timed dry on your dryer and then line drying your now damp (not wet) clothes indoors. The dryer will take a lot of the excess moisture out of your clothes, which decreases the bad effects of the humidity of indoor air drying, hastens the drying process, fluffs your clothes, and saves a bit of money.
Your dryer bill could be as little as $0.04 per load (5 minutes) or $0.12 per load (15 minutes), instead of $0.37 per load for the full cycle. If you put your clothes in a sunny patch, on top of a radiator, or in front of an open window, you can maximize your drying process while minimizing the cost.
If you live in a humid, cold climate, work 9-5, are a night person, and do laundry infrequently, air drying is more of an inconvenience than it is a way to save money. Under these conditions, air drying outside is essentially impossible while air drying inside might actually cost more rather than less. If it would require a humidifier or fan to get your clothes clean, the energy of both those units can actually make the overall cost more than your dryer, rather than less.
In these conditions, you should pay the fee and dry your heaviest clothes in the dryer. Jeans air drying in a humid climate is not only a potential added expense but also could have negative effects on your overall health. As for thinner items, the savings between the dryer and air drying inside is a toss up at this point, which is why I would say take advantage of the convenience and use the dryer.
Effective Clothes Drying
Keep your dryer inside. According to Consumer Energy Center, “Putting it in a cold or damp basement or an unheated garage will make the dryer work harder and less efficiently.”
Do loads one after another. Your dryer will have some leftover heat when it finishes one load. If you immediately start the next, you can capitalize on that retained heat and save a bit of money. The same can be true for laundromat dryers where you pay by the minute. If you find one that is still warm or do one load after another in the same dryer, you can save money.
Sort your laundry before putting it into the dryer into slow-drying and quick-drying. “Over drying,” says Barb,”shrinks clothes, causes fading, and ruins the fibers causing them to wear out faster.” Thus, removing those quick-drying items from a largely slow-drying load can help extend their life. Your slow-drying pile will likely be jeans, towels, sweatshirts, blankets, and thick fabrics. Your quick-drying pile should be sheets, khakis, dress shirts, underwear, and synthetic fabrics like nylon and spandex. Cotton can go in either pile depending on its thickness. Barb also says, “some clothing should never be put in the dryer (wool, silks, rayon, items that are lined).”
Shake and untangle your clothes as you take them out of the washing machine. Clothes get spun around in the washing machine and have normally formed a giant tangled ball by the time the cycle finishes. If you then throw the entire clothing ball into the dryer, you could potentially lengthen the drying time by 10 – 20 minutes, costing you an extra $0.08 – $0.16 per load. Instead, if you take the time to add each item of clothing individually into the dryer, shaking off the excess water, you can save money and dryer time.
Check each item for stains before putting in the dryer. Hot air sets stains even more than the washing machine. If an article of clothing had a stain on it that you were hoping laundering would remove, check it before placing it in the dryer. If the stain persists, wash it again before heat drying.
Remove the lint from the filter after each use. If you let the lint build up on the filter, you’re increasing your dryer’s risk of starting a fire. In the article “10 Most Common Causes of House Fires,” Anna reports:
There have been reports of dryer sheets that could lead to fires in the laundry area but it is far more common for improper dryer vents and venting to be the cause of a dryer related fire. It’s also incredibly important to stay on top of clearing lint away from the dryer (under it, on top of it, behind it, etc.). Treat this has highly flammable material and just keep your dryer well maintained. Here is another great article on this subject.
Furthermore, Consumer Energy Center says, “A dirty lint screen can cause your dryer to use up to 30 percent more energy.” Real Simple also points out that “if you are planning on camping out this summer, collect dryer lint in a coffee can. Lint makes high-quality tinder because it is extremely combustible, which is a main reason you shouldn’t let it build up in the dryer.”
Scrub your lint filter with detergent and water. All of the air that goes into your dryer must pass through the lint filter. When your filter has a waxy build up on it, the air flow is constricted, making your dryer less efficient. A dirty lint trap can increase the drying time, again costing you money. “If the lint filter is full,” About.Com writes, “air is not flowing freely and your machine is forced to work longer than necessary.” Real Simple says you should “periodically wash the screen with dish detergent and a scrub brush to remove film. You’ll know it’s time when lint no longer sticks to the screen, but peels off in one big piece.”
Clean the exhaust every two years. WikiHow has an article with pictures on how to do this, but the basic plan is detach the exhaust hose from the back of the dryer and then vacuum it. Then go outside and vacuum the exhaust vent. Then reattach everything. While you’re at it, you should check that your outdoor exhaust vent closes tightly (if it doesn’t you should replace it to save on heating / cooling bills) and also vacuum behind, under, and inside your dryer and the same for your lint filter. Over time, lint really builds up around the dryer and can be a very dangerous fire hazard.
Furthermore, if you’re ever replacing your exhaust duct, Consumer Energy Center says:
If you vent the exhaust outside, use the straightest and shortest metal duct available. Flexible vinyl duct isn’t recommended because it restricts the airflow, can be crushed, and may not withstand high temperatures from the dryer.
Use less dryer sheet, especially when you have less clothes. Real Simple suggests using a half- or quarter-sheet per load. Give less dryer sheet a try and see if it has the results you wanted.
Air dry or use low heat for clothing with lots of elastic. About.Com says, “Items like bras and bathing suits that have a lot of elastic should also be air dried to retain elastic integrity.” They also say that “polyester, lycra, or knit fabric clothing” tend to look newer for longer if they are air dried. A lot of times their care instruction will reflect this fact by suggesting you use the gentle cycle or tumble dry low. Follow these instructions to help your clothing last longer.
Remove your clothes as soon as possible to prevent wrinkles.
If your dryer is acting funny, here is a very thorough list of common dryer problems and their solutions.
Dryer Setting & Types
| Machine Dry – If your clothing has this symbol or says to “tumble dry” it, but doesn’t specify a heat level. It is normally safe to assume that that means this piece of clothing can take any heat level. Sort it according to its perceived drying speed and then let it dry at the heat requirements of the rest of the load. If you are worried about it, look up its fabric blend on Shop Well With You’s fabric care guide. | |
|
|
|
| No Heat – Some dryers have an “Air Dry” setting, which is intended for items that can’t take any heat. Real Simple says this is items like “plastic tablecloths and rubber-backed rugs.” Such items can be air dried instead and save a bit of money. For Dummies also adds that air dry is “great for fluffing pillows or refreshing clothes.” | |
|
|
|
|
|
Low Heat / Gentle – Delicate clothes that require a gentle cycle are frequently “polyester or lycra blends, sweaters and fine wearables,” according to About.Com. However, because the gentle cycle is out of the ordinary, there is a good chance your delicates will have one of these two symbols printed on the tag or say “tumble dry low, gentle cycle” on the tag. Spandex or clothing with a lot of elastic in it is one exception to this rule. Although they can go in the dryer at high heats, they will last longer if they are either air dried or given the gentle cycle. |
|
|
|
|
|
Medium Heat / Permanent Press – Medium heat and the permanent press setting are intended for synthetic fabrics, which are supposed to be wrinkle-free. The permanent press setting has a cool-down period at the end, which, according to Real Simple, “cuts down on the wrinkles that form when clothes sit in the machine.” When in doubt, run your clothes at medium heat. |
|
|
|
| High Heat / Cotton – According to How to Dry Clothes in a Clothes Dryer For Dummies, high heat is best used for towels, jeans, sweats, and other heavy fabrics. Real Simple recommends sorting out an entire load of slow-drying clothes, most of which can also endure high heat, and running them through the dryer in their own load. “Otherwise,” they say, “the lightweight items will tumble longer than they need to and end up ‘over-dried,’ which will cause garments to prematurely wear, fray and lose elasticity.” This would mean doing a load of towels, jeans, sweatshirts, and any thick fabrics and turning the heat up only for this load. The Quick Dry setting often uses high heat but only for half of the normal cycle time. |
|
|
|
|
|
|
Do Not Machine Dry – Sometimes garments will print one of these two symbols or explicitly say “do not machine dry.” This symbol is almost always accompanied by alternate drying instructions. Simply follow the instructions of the other symbol. Also, let this be a lesson to you: read the tags of items before you buy them. Otherwise, you never know what kind of care you’re buying into. If there isn’t a set of alternative drying instructions, it is normally coupled with with “Dry Clean Only.” |
|
|
|
| Dry In Shade – Sunlight is natural bleach, which is one reason why families laundering cloth diapers love line drying in the sunlight. However, that also means that dark or bright colors can be diminished by outdoor line drying. Most items can just be turned inside out, to protect the side that matters, but some items will specifically ask to be dried in the shade. Synthetic fabrics do best in the shade. | |
|
|
|
|
|
Line Dry / Drip Dry – WikiHow has a wonderful article with pictures and step by step instruction for the best way to line dry your clothing. Furthermore, LineDry.com adds a few tips and tricks. The basic trick is shake and snap your laundry before putting it on the line to remove any excess water and again when you take your laundry down to loosen it of pollen, bugs, or leaves. |
|
|
|
| Dry Flat – Some clothing like knit sweaters, wool, or sleeping bags should only be dried flat. This is because water relaxes of the fabric fibers and then the pull of gravity can stretch these clothes out. However, flat drying takes a long time and requires a resilient surface that can take the water without staining. For this reason, Real Simple recommends using a salad spinner to remove some of the excess wetness of these more delicate items before flat drying them. | |
|
|
|
A more complete list of symbols and their meanings can be found here.
Summary
- Line dry if you are in the right climate for it and have a schedule flexible enough to do so.
If not, you should likely use the dryer over indoor drying. - Remove lint from around the dryer and the exhaust regularly.
- Sort your clothing into quick- and slow-drying and dry them separately.
- Read the tags on your clothes. Use medium heat when unsure or worried.
- If your clothes come out of the dryer damp, consider drip drying the rest of the way to save money.

Photo and photo used here under Flickr Creative Commons.
Latest posts from Megan Russell
- Four DPOA Limitations at Schwab and Their Solutions - July 23, 2024
- #TBT Implement the Automatic Millionaire at Schwab - July 18, 2024
- How to Implement a DPOA at Schwab - July 16, 2024
One Response
Kate Burns
I stick to drying sheets and towels (and large, heavy tees) in the machine (big, add a lot of humidity to the apartment, get stiff on the line/rack) and line/rack drying everything else to help them last longer, fit better, and reduce my energy expenses. In this case, I think a prudent combination of machine and line drying is best! I also find no need to use fabric softener on the things that I do end up line drying. Placing my line/rack items near the heater/air conditioner, though I rarely run it, helps with faster drying and less humidity it seems.